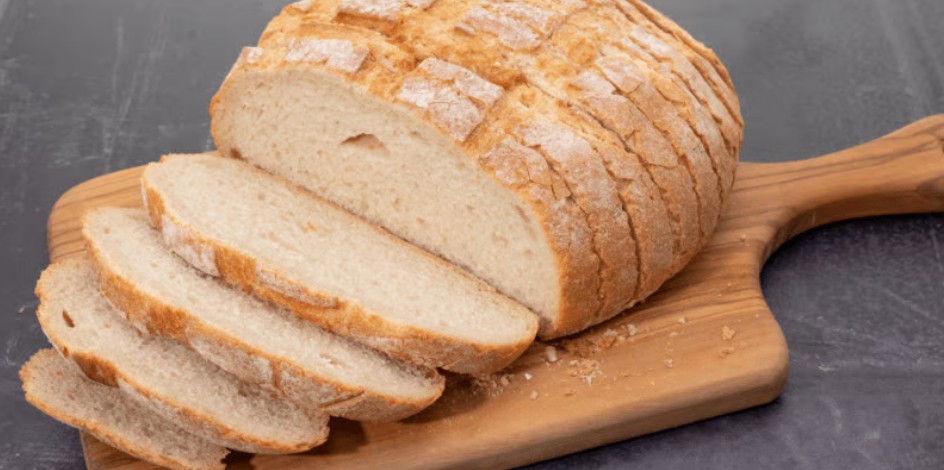
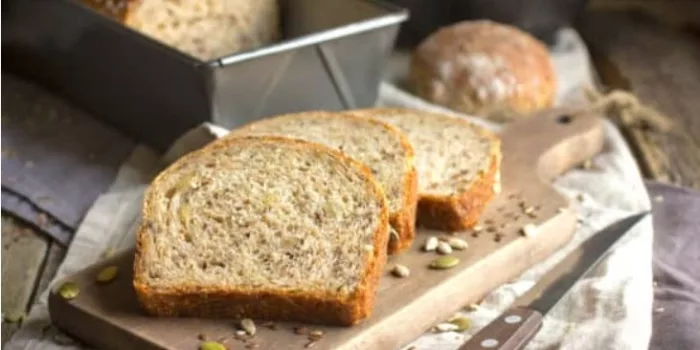
Are you annoyed and dissatisfied that your handmade bread turned out to be heavier, denser, and smaller than you expected? Tragically, anyone can experience it, particularly amateurs and experimenters. This article will explain why your bread is dense and heavy, while also detailing what you should be doing to make it lighter and fluffier.

There’s something special about making your own bread. Everything from sourdough bread and challah to sandwich bread and baguettes is delicious.
One of the factors that intimidate people regarding bread baking is how uneven the processes and results might appear after following the recipe exactly.
Everything in bread baking is interconnected, so if one item changes or goes wrong, the entire process might be thrown off.
Even if you regularly bake bread and have superb bread-making abilities, you never know what could go wrong.
What is the primary reason for dense bread?
Every rookie bread baker is required to bake a dense loaf at least once since it takes time to comprehend how bread functions.

There are numerous explanations, of which some are more typical than others. For several of them, fermentation plays a key role. The process through which yeast raises bread is referred to as fermentation.
Dense bread is frequently the result of fermentation that is too rapid or too slow, excessively long or too short, or not as expected.
Is there a high proportion of whole-grain flour to white flour in your bread?
Bread with a large proportion of whole-grain flour has a modest rise. In bread recipes, the texture will change if whole wheat flour is used in place of white flour.

If you’re not working with a tested whole-wheat recipe, a cup of white flour should be swapped out for a cup of whole-grain flour. Increase the quantity the next time if it works well. Take care not to use too much flour.
I don’t recommend replacing more than 50% of the flour in a standard homemade bread recipe with whole wheat flour. Nonetheless, your bread would be slightly denser than a loaf made entirely with bread flour.
Do you use freshly made flour?
Whole wheat flour has a high risk of becoming rancid. Preserve whole grains in the refrigerator or freezer, particularly if you reside in a hot and humid climate.

Bread and all-purpose flour last longer, but they have an expiration date.
The shortness of the freshness window may surprise you. So don’t let stale flour ruin your hopes for a light and fluffy loaf of bread.
Are there excessive extras?
Seeds, fruits, and nuts can add weight to the dough.

If you believe this is an issue, consider decreasing the amount.
Do you use salt?
Home bakers on low-sodium diets may wish to exclude all salt entirely. Without salt, the yeast ferments too quickly. Similarly, too much salt can discourage fermentation.

Assume an automobile is the bread dough. The salt stands in for the brake, whereas the gas pedal stands in for yeast.
Driving without using brakes will almost always result in a crash. Likewise, without salt, yeast in the bread will typically deplete itself far too rapidly, resulting in a dense crumb.
Operating a car while pressing the brake pedal will not lead you anywhere. Similarly, excess salt can prevent your bread loaf from rising as it ought to.

To ensure that your bread loaf emerges properly, you must use both yeast and salt. However, this concept is more obvious in some recipes than in others.
If you’re monitoring your salt intake, try cutting back rather than cutting completely. Unless otherwise specified in the recipe, weigh the salt. If the recipe does not specify salt, try sea or table salt.
Do you become preoccupied and forget an ingredient or lose count?
We’ve all done it. If you use excessive or inadequate amounts of flour or liquid, dense and heavy bread will be produced.

It’s an excellent habit to measure or weigh things in advance.
Is your water chlorinated heavily?
Water with quite a high chlorine content does not usually get along with yeast. If you’re having difficulties with your bread, try spring water instead of tap water.

Or before using, fill a pitcher with water and leave it on the table for a day to allow the chlorine to disperse.
Is the yeast still active?
Examine the expiry date. Yeast can go bad, and when that happens, it can no longer be utilized to bake bread. If you’re not sure, incorporate the yeast into a small amount of the recipe’s liquid. Within the following 10–15 minutes, keep an eye out for bubbles.
Bubbles indicate that the yeast is active. The issue with dry dough, whether from too much flour or not enough water, is that the yeast cannot mature and work its magic.
Do you knead the dough long enough to produce gluten?
Before bread baking, you have to first generate gluten. Without delving too deep into the weeds, the gluten should always disentangle and reassemble into long strands.

All the carbon dioxide bubbles that the yeast produces will be contained in this “netted bag” made out of these strands.
A traditional recipe would result in a dough that is smooth, shiny, and elastic when the strands are well-organized and firm. The windowpane test is one method some people used to gauge gluten development.
Spread the dough between your fingers to test whether you can strain the dough (gluten strands)thin enough to see through without it splitting.
Continue kneading if the dough is tough and rips readily. Experience tells you when the dough is ready.
Do you fully proof or raise the bread at least twice?
In the majority of bread recipes, the dough rises twice. If you skip either bread rise time, you will get a tiny and dense loaf.
How can you tell whether the bread has risen sufficiently the first time?
Using two floured fingertips, make an indentation in the dough. If the dough was thoroughly proofed, it will fill in the hole gradually and quickly.

The dough should then be lightly degassed or flattened with your hands before shaping.
The dough must rise for a longer period if the hole quickly fills. Return in 15 to 30 minutes. If the hole does not fill in, the dough was probably over-proofed.
Gently push it down and let it rise again. If you watch it closely and catch it at the proper time, you might get a great loaf, but there are no promises.
How can you tell when the bread has risen sufficiently a second time?
Press gently on the side of the bread dough with one finger or knuckle. The dough should be slightly indented. If it immediately bounces back, then the dough is not prepared.

If the indentation does not fill in, the dough is probably over-proofed and will fall when baked. Your prize will be dense bread.
Other suggestions for the second rise:
When working with a loaf pan, the dough shouldn’t be more than halfway full. When the dough peeks over the edge, it is time to bake the bread.
Although the first rise is normally completed whenever the dough has nearly doubled in size, the second rise should be completed just before the dough has doubled.
This gives the oven a little more spring. If your bread does not grow in size between the time you put it in the oven and the time you take it out, you know the dough rose a bit too much the second time.
Do you add too much flour to the dough when shaping it?
Dust your hands and worktop with flour. This is ordinarily not an issue, provided the dough is mixed to the proper consistency.

Rub your hands in olive oil or water rather than flour to make them less sticky.
Does the oven warm before baking the bread?
A loaf of bread gets an oven spring when it is heated to a high temperature. In a hot oven that has been preheated, your bread will puff up. Extreme heat makes the crumb lighter and airier, especially in rustic bread.
An oven won’t get much hotter than 350℉. In addition, the bread dough is currently preheating in the oven.
This is why it’s challenging to use an oven to produce a sufficient oven spring and a golden, crispy crust.
Do you wait for the loaf to cool completely before cutting it?
Depending on their size, bread loaves can cool for 1 to 3 hours. The starches are still migrating and settling at this point.

As a result, cutting the bread too soon may result in sticky and dense bread.
Do you include hot ingredients?
Frequently, ingredients like hot liquids, butter, or flavorings like freshly roasted nuts can kill the yeast. Let any heated components cool before adding them. Around 120℉, yeast may begin to die off. At 140℉, it will not survive.
FAQ
How do I make my bread less dense?
Making less dense bread is primarily about utilizing the proper ingredients and the proper procedure, to a certain extent.
The key ingredients include:
- bread flour
- active yeast
- dough improvers
These components, when coupled with the proper procedure, will yield the perfect handmade bread every time, as detailed below.
Some specialists will claim that baking light, fluffy bread is all about the rise time or the ideal recipe, but they won’t provide you with a specific rise time or a precise method. Below is a list of all the ingredients you’ll need to make the ideal light and fluffy bread.
Bread flour
It is critical to work with bread flour as opposed to all-purpose flour while preparing bread. You might wonder why you can’t just use standard all-purpose flour.
Simply explained, because bread flour contains more protein, or gluten, the dough is fluffier and lighter, producing a less dense final product.
The stability, form, and consequently, the degree of increase are all improved due to the high protein content. All-purpose flour produces a shorter bread with less rise. Using flour that contains a lot of protein can easily make bread chewy.
To go a bit further, bread flour with a higher protein level will likely have more gluten. Gluten development makes the dough smooth and flexible. Simply put, it was created to be mixed with yeast in loaves.
All-purpose flour is typically a decent choice because it is a low-protein flour, but when specialty flour such as pastry flour, flour for bread, and cake flour is called for in a recipe, they can unquestionably improve the outcome.
If you don’t want your handmade bread to be dense and heavy, work with bread flour.
Yeast (instant)
When yeast is given substances like gluten, sugar, and other things, the result is gas being developed in the dough.
This gas is retained in the gluten network as the bread bakes, which causes the loaf to rise. The gas is created while the yeast develops. When the amount of yeast in the dough increases, more gas is produced. The final product will be fluffier if the dough has more gas. You now realize that yeast is what causes bread dough to rise.
Yeast comes in different varieties. The moisture content and granule size are what distinguishes them.
The following is a list of the several yeast species, all of which are live organisms: active dry yeast, instant yeast, fresh cake yeast, and rapid yeast.
Instant yeast is the finest yeast for preventing dense and heavy bread. These are a few of the reasons why I feel instant yeast is the finest option for making airy, fluffy bread.
To keep it fresh, fresh yeast must be frozen or chilled because it is generally moist. Since it needs to be proofed, it will spoil more quickly.
This implies that you must combine the yeast with warm water and sugar. It will not operate if the water is too hot or too cold. Many bakers are put off by this method.
They are also termed “dry yeast” since the moisture has been removed from them, allowing them to remain considerably longer.
That being said, active dried yeast, such as fresh yeast, must be proofed. Instant yeast is the sort of yeast that does not need to be proofed, rises quickly, and does not forfeit any flavor.
Also, vitamin C is commonly added to instant yeast to extend its shelf life and improve the dough.
Dough enhancers
They are very vital, to avoid baking bread so dense. If I say “dough enhancers,” you may think that I am suggesting that you add chemicals or other strange stuff to your dough, but all the ones that’ll be discussed are natural.
Furthermore, commercial bakers use them in bread baking. They are used for two primary purposes.
One is for storing the dough, while the other is simply for making bread rise by nourishing the yeast. The components listed below can be employed together or separately to enrich your dough.
Lecithin
Lecithin maintains the bread’s moisture and softness for a longer period by holding onto moisture. It gives your handmade bread the appearance and texture of bread from a reputable bakery.
This component acts as an emulsifier to improve the mixing of all the elements.
Furthermore, It creates a sort of elasticity or covering that holds the gas bubbles made by the yeast in the dough, enabling a quicker rise. Additionally, it softens and tenderizes the crust’s exterior.
Vitamin C powder
It makes the dough better by two mechanisms. It acts as a preserving agent and lightens the bread by supporting the yeast in its job. You don’t need much of this to flavor the dough.
Ginger powder
Without changing the flavor, it can make the dough better and produce a lighter, fluffier loaf of bread. Once more, ginger promotes the growth of yeast and works as a natural preserving agent.
Potato Water or Potato Flakes
Potatoes, as you may be aware, are high in starch. Starch aids the dough by retaining gas from the yeast and increasing the size of the bubbles. This aids in the bread rising and becoming lighter and fluffier.
When cooking potatoes, you can substitute unsalted water for the water in your bread recipe to aid the yeast.
Potato flakes perform the same function as potato water, but without the need to boil potatoes.
Wheat Gluten
When comparing gluten-free bread to regular bread, you’ll see that the former is denser. This is because wheat gluten, which is found in flour for bread, reinforces the dough and then encases the gas created by the yeast.
To make the dough fluffier and lighter, you may choose to add a small bit of vital wheat gluten. The strength of the dough increases with the amount of gluten present.
Powdered Milk
The bread loaf will rise more quickly if milk powder is added to the dough. Furthermore, the loaf will be soft and moist for a longer period, implying that it will survive longer. It also helps turn the crust brown.
To prevent bread so dense, add 2 tablespoons dry milk to each loaf of bread.
Apple cider vinegar or white vinegar
Vinegar, like ascorbic acid, has a comparable impact on the dough. It keeps the dough together and prevents the bubbles from popping. It helps to maintain the dough’s integrity and reinforces the gluten connections.
Procedure
The elements listed above are the primary ones that will prevent bread so dense and heavy and more into a soft, fluffy loaf. Furthermore, there is a method for creating the perfect bread loaf.
The method is simplified if you use bread flour, an enhancer like lecithin, and instant yeast. To knead bread is the basic process that ought to be observed in all recipes.
You can make this in a stand mixer, bread machine, or by hand. Whatever method you use, the dough must be kneaded until it is smooth and soft. It takes around 5 minutes in a mixer, but it takes approximately 10–15 minutes if you knead the dough by hand.
This demonstrates that the components were activated, the gas was released, and the dough is adequate to keep the gas in.
If you need to read more about the bread too dense, please read this article.
What makes bread light and fluffy?
You may make your bread light and fluffy in a variety of ways. One method is to increase the amount of liquid in the dough.
This will soften and fluff it. Utilizing a wetter dough mix is another approach to adding additional moisture.
You can also reduce the density of your bread by baking it at a higher temperature during the first rising cycle. Finally, you may experiment with a small loaf pan.
Does too much yeast make bread dense?
Yeast can be detected in a sourdough starter or baker’s yeast and plays a few key roles in bread production.
To generate fluffier and lighter bread, yeast primarily creates carbon dioxide gas. As a result, adding more yeast will result in much fluffier bread.
How do you make bread soft and fluffier?
The most crucial component of making fluffy bread is the process of kneading, rising, and baking. There are, however, a few alternative options.
Using bread flour and quick yeast, for example, is great. You can also incorporate dough conditioners like vitamin C powder or lecithin.
Conclusion
If you have bread-baking plans, I hope this article has taught you how to make them less dense. I hope that the next time you bake, you won’t have to throw it out.
Following the simple instructions given above, you ought to be able to get baked bread that is fluffy and light rather than hefty and compact. Try these approaches the next time you are baking bread at home.
If you need to read about the best pancake griddle, please read our article.


